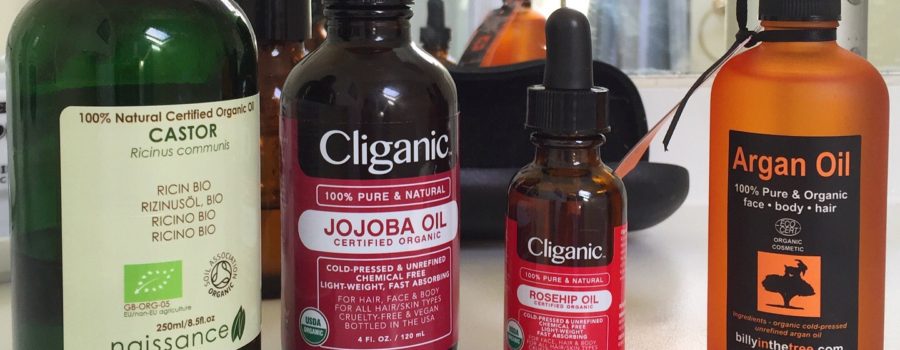
I’ve been creating my own facial oil for years now. But I admit, I still use commercial body lotion!
I’ve tried many body lotions in the past, some on the cheaper end and some at the expensive end. But not many are as comfortable on my skin as the one I currently use.
The thing that I find with most lotions are either they’re heavily perfumed, which I don’t like or they claim to be ‘rich and nourishing’.
The rich and nourishing ones tend to just ‘sit’ on my skin. As soon as I get dressed and get on with my day, the lotion rubs off on my clothes and I may as well not have put the lotion on.
The result being, that I end up with dry, itchy and uncomfortable skin. That’s why I’m really picky with what I put on my skin.
My facial oil however, I’m even more picky with! I’ve always been careful about what I put on my face.
Use Organic Oils

The oils I use are castor, jojoba, rosehip and argan oil.
I tend to use organic oils, so that I know that my skin is nourished, with nutrients that will help keep my skin supple.
I did my research and these oils are the ones that are the least comedogenic. This means that they are less likely to clog your face and give you spots.
I’ve been mixing my own facial oil for around three years now, using this formula and I haven’t broken out in spots. So I know these work for me.
Make Your Facial Oil & Save Money
As I only use about 4-5 drops each time, the individual bottles of oil last at least a year! As I used to spend around £45 per month on facial moisturiser, so you can understand why I create my own facial oil.
Storing Your Mixed Facial Oil
You’ll also need a dark brown bottle with a pipette to mix and store the oil in.
I currently use a 20ml bottle, but have bought 30ml ones for when the 20ml needs replacing. Read: I’m getting lazy mixing often. Each mix will last a month or so.
I also prefer a bottle with a pipette, as it gives me more control on how much to use each time.
The reason I don’t mix a larger batch, is so that the mixed oils won’t oxidise as much. I just feel that opening and closing a bigger bottle leaves the mixed oil open to oxidation or going off.
I don’t wash the bottle every time I create a batch, so I tend to replace a brown bottle every 4-6 months.
Before mixing your facial oil, wash the brown bottle and pipette really well in warm soapy water and allow to dry thoroughly. I dry mine in the airing cupboard overnight, to ensure there’s no water moisture left.
How much oil to use in each mixture?
It’s not exact measurements.
- Fill 2/5 of the brown bottle with castor oil first, as it’s thicker in consistency and helps to apply the mixed oils easier.
- Then fill 1/5 of the bottle with jojoba oil.
- Add two pipette fulls of rosehip oil and
- Fill to 4/5 of the bottle with argan oil
- Ensure there is enough space at the top of the brown bottle, so the oils can be mixed properly.
Put the lid on the brown bottle and mix thoroughly, shaking and turning the bottle for a few minutes. This is pretty much how I make my facial oil.
Using the facial oils
I use the oils after washing my face, morning and night.
Put about 4-5 drops in the palm of one hand and use the other hand to apply.
I tend to start under my eyes by dabbing gently and work up to the eyelids, moving from one eye to the other.
I then apply a dab each on my cheeks, a dab around my mouth and then my forehead.
You literally need just a dab on each area of your face. You only need the tiniest amount and that’s what makes it economical.
I often have a little oil left over in my palm, so I use it on my ears, as I have small patches of eczema there.
I hope you’ve found this useful and will try it out. Let me know what you think!


